The Ultimate Guide to Anodizing Aluminum: Type II vs. Type III
Published Date:
Share
Table of Contents
Newsletter
Subscribe our newsletter to get update information, news and free insight.
For engineers and product designers, aluminum is the material of choice for its strength-to-weight ratio and machinability. But raw aluminum has an Achilles’ heel: it is soft, prone to scratching, and oxidizes unevenly when exposed to the elements.
This is where Anodizing enters the equation. It is the most specified surface finish for CNC machined aluminum parts, creating a surface that is harder than steel and chemically integrated with the base metal.
However, a simple note saying “Anodize Black” on a technical drawing is a recipe for manufacturing disaster.
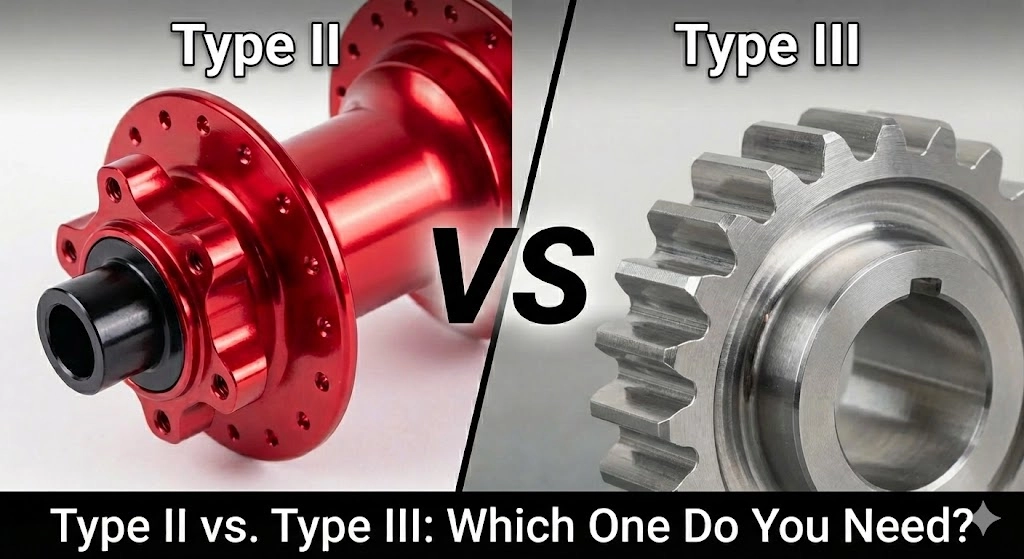
There is a fundamental engineering divide between Type II (Sulfuric/Decorative) and Type III (Hardcoat) anodizing. These are not just different colors; they are chemically distinct coatings with vastly different thermal, electrical, and dimensional properties. Choosing the wrong one can lead to parts that seize, corrode, or fail to assemble due to unexpected dimensional growth.
This comprehensive guide is your engineering handbook for anodizing. We will dissect the electrochemical differences, explore the impact on tolerances (DFM), analyze alloy compatibility, and provide the data you need to specify the perfect finish for your JFManufacturer parts.
The Science of Anodizing: How It Works
To understand the difference between Type II and Type III, we must first understand the process itself. Anodizing is an electrolytic passivation process. Unlike paint or powder coating, which applies a layer on top of the material, anodizing essentially “grows” a layer out of the base metal.
The Electrochemical Cell
The aluminum part is submerged in an acid electrolyte bath (typically sulfuric acid) and serves as the anode (positive electrode). A cathode (negative electrode) is placed in the tank. When an electrical current is passed through the bath, oxygen ions are released from the acid and combine with the aluminum atoms on the surface of the part.
This reaction forms Aluminum Oxide (Al₂O₃). This ceramic-like layer is integral to the substrate—it cannot chip or peel off like paint.
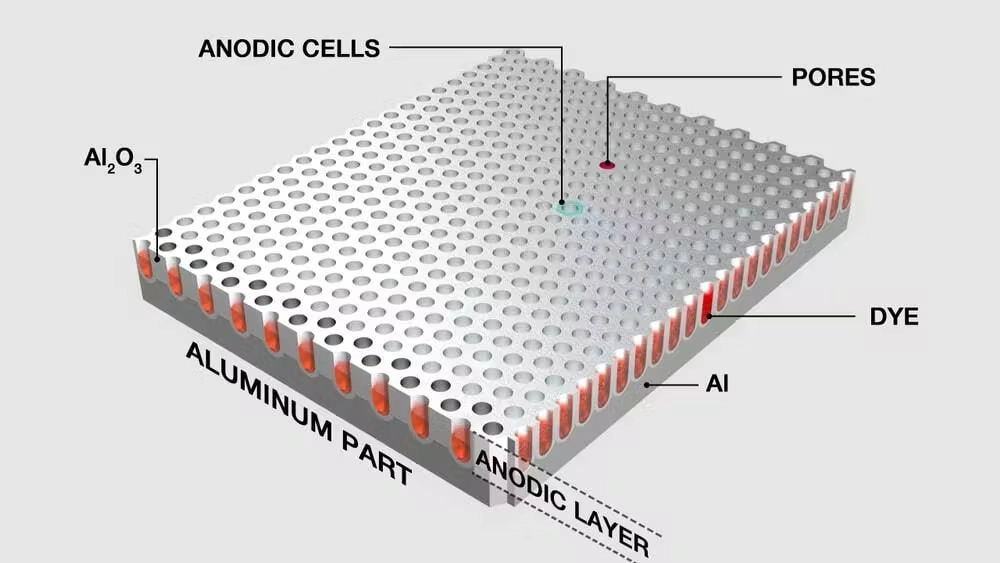
The Nanoscopic Pore Structure
As the oxide layer builds, it forms a unique hexagonal structure with nanoscopic pores (tubes) reaching down to the base metal.
Dye Absorption: These pores are what allow aluminum to be dyed. They act like capillaries, sucking up pigment or dye.
Sealing: Once the dye is applied (or if the part is clear), the pores must be “sealed” (typically using hot water or nickel acetate) to close the tops of the tubes, locking in the color and preventing corrosion.
Microscopic cross-section diagram showing the hexagonal pore structure of the anodic layer on aluminum substrate.
Type II Anodizing: The Aesthetic & Protective Standard
MIL-A-8625 Type II, commonly referred to as “Standard,” “Decorative,” or “Sulfuric” anodizing, is the workhorse of the aluminum industry. It provides a baseline level of corrosion protection and is the primary method for coloring parts.
The Process Parameters
Type II anodizing is typically performed in a sulfuric acid bath at a temperature of 68°F to 72°F (20°C – 22°C). The current density is moderate (approx. 12-15 amps per square foot). This controlled environment allows the pore structure to remain open enough for effective dyeing but limits the maximum thickness and hardness of the coating.
Key Engineering Properties
Thickness: The standard specification typically ranges from 5 to 25 microns (0.0002” to 0.001”). For most commercial applications, a thickness of 10-15 microns is the “sweet spot” for color saturation.
Hardness: While harder than raw aluminum, Type II is still susceptible to scratches from hard metals. It creates a surface roughly equivalent to the hardness of a copper penny.
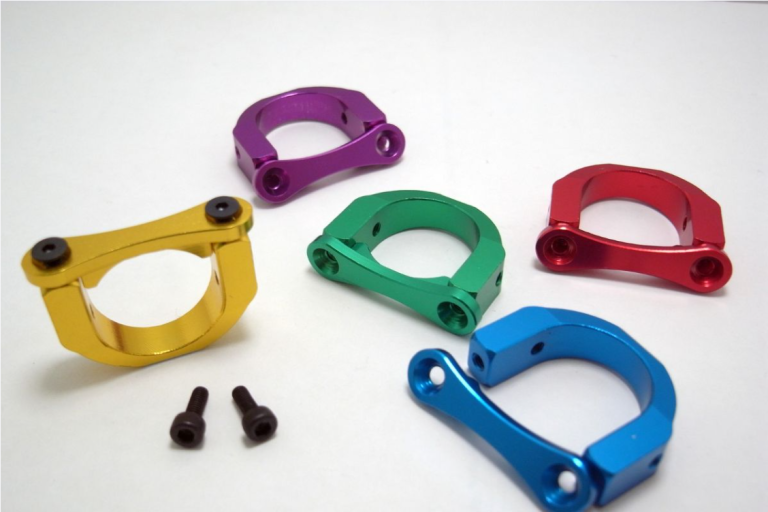
Color Versatility: Because the coating is relatively clear and the pore structure is receptive, Type II can be dyed virtually any color—from vibrant reds and blues to deep blacks and gold.
Corrosion Resistance: When properly sealed, Type II passes the 336-hour salt spray test [ASTM B117], making it suitable for outdoor applications.
Ideal Applications:
Consumer electronics chassis (laptops, phones).
Drone and UAV components (lightweight protection).
Architectural brackets and trim.
Automotive interior components.
Type III Anodizing: The “Hardcoat” Engineering Shield
MIL-A-8625 Type III, or “Hardcoat,” is an engineering-grade finish designed for function over form. It is used when a part needs to survive sliding friction, abrasive environments, or high voltages.
The Process Differences
The chemistry is similar to Type II (sulfuric acid), but the operating conditions are extreme.
Temperature: The bath is chilled to near freezing, typically 32°F – 40°F (0°C – 4°C).
Voltage: The voltage applied is much higher (up to 100V), and the current density is significantly increased (24-40 amps per square foot).
This high-energy, low-temperature environment forces the oxide layer to grow much faster and denser. The low temperature prevents the acid from “eating back” the coating as it forms, allowing a much thicker layer to build up.
Key Engineering Properties
Thickness: Hardcoat is significantly thicker, typically specified at 50 microns (0.002”). It can range from 25µm to over 75µm depending on the alloy.
Extreme Hardness: A proper Type III coating has a hardness of 60-70 Rockwell C. This is harder than tool steel and comparable to the hardness of sapphire. It is extremely abrasion-resistant.
Dielectric Strength: Type III is an excellent electrical insulator. A 50-micron coating can withstand breakdown voltages of 800V to 2000V, making it ideal for electronics housing.
Thermal Insulation: The thick ceramic layer acts as a thermal barrier. While the aluminum substrate dissipates heat well, the coating itself resists heat transfer.
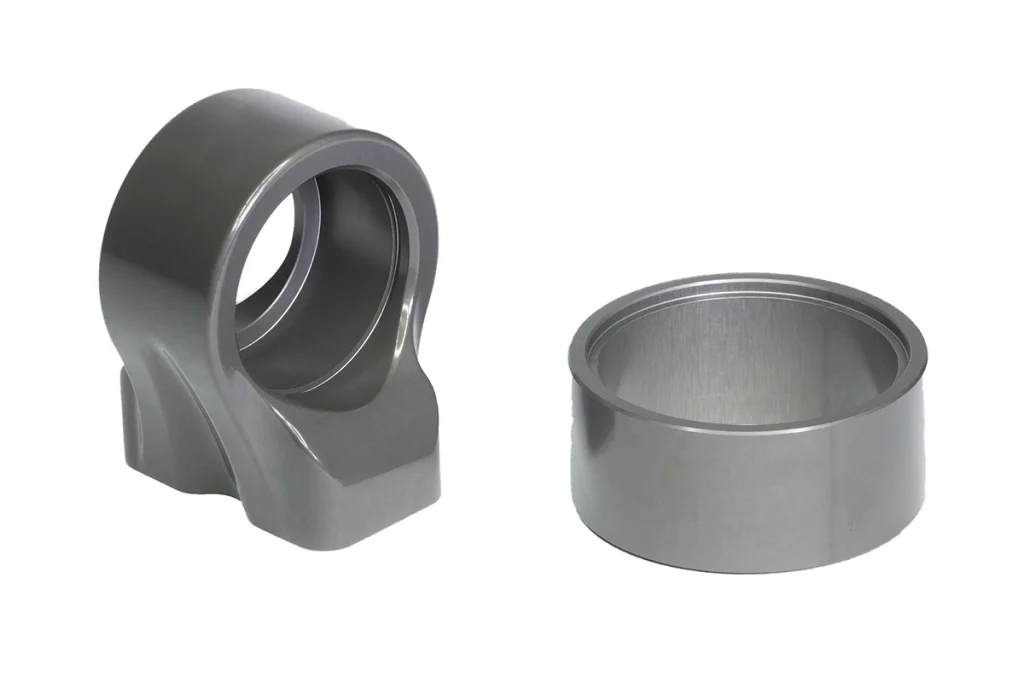
The “Color Problem” with Hardcoat
Engineers are often disappointed to learn they cannot get a “Apple Red” hardcoat.
Because the coating is so dense and thick, it is not clear like Type II. It has a natural, inherent color ranging from Dark Grey to Bronze/Brown.
Dyeing: You can dye it Black, but the result is often a matte, charcoal black rather than a jet black.
Light Colors: Dyeing Hardcoat red or blue results in a muddy, dark maroon or navy because the dye fights with the natural dark background of the oxide.
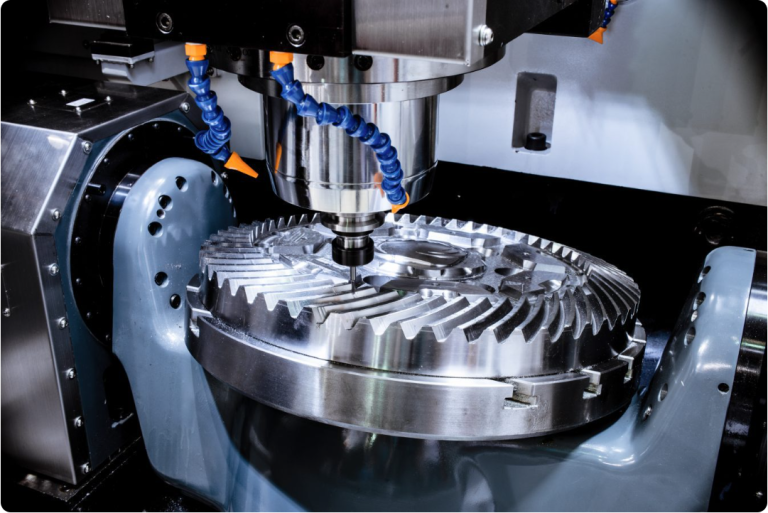
Industrial aluminum gears and pistons with Type III hardcoat anodizing, showing the natural dark grey finish.
Technical Comparison: Type II vs. Type III
The following table summarizes the data crucial for material selection.
Feature
Type II (Standard)
Type III (Hardcoat)
Standard Thickness
5 – 25 µm (0.0002″ – 0.001″)
25 – 75+ µm (0.001″ – 0.003″)
Vickers Hardness (HV)
~ 300 – 400 HV
~ 900 – 1100 HV
Wear Resistance (Taber)
Fair (Cosmetic protection)
Excellent (< 1.5mg loss/1000 cycles)
Coefficient of Friction
Moderate
Low (Especially if PTFE sealed)
Dielectric Strength
Good
High (Insulator)
Appearance
Clear, Vibrant Colors, Glossy
Matte, Dark Grey, Bronze, Black
Cracking (Crazing)
Rare under normal heat
Common above 160°C (320°F)
Cost
$ (Baseline)
$$ (30-50% Higher)
Design for Manufacturability (DFM): Critical Considerations
Anodizing is not magic; it is a physical manufacturing process that alters the dimensions and surface quality of your part. Ignoring these factors is the leading cause of scrapped precision parts.
1. The “50/50 Rule” of Dimensional Growth
This is the most critical concept for machining tolerances.
Unlike plating (which adds material on top) or chemical conversion (which removes material), anodizing does both. The oxide layer grows from the aluminum substrate:
~50% penetrates INTO the surface.
~50% builds UP OUTWARDS.
The Math:
If you specify a 50µm (0.002”) Type III Hardcoat:
The coating penetrates 25µm into the aluminum.
The coating adds 25µm (0.001”) of growth per surface.
Total Diameter Change: On a cylindrical shaft, growth occurs on both sides. Therefore, the total diameter increases by 50µm (0.002”).
Actionable Advice:
If you have a 10.00mm shaft with a tolerance of +0.00/-0.02mm, and you apply Hardcoat, the final part will measure ~10.05mm and fail inspection. You MUST machine the part undersized (e.g., to 9.95mm) to account for the post-anodize growth.
2. Surface Roughness (Ra) Degradation
Anodizing does not hide surface imperfections; it highlights them. Furthermore, Type III Hardcoat tends to slightly roughen the surface finish.
If you start with an Ra 0.8µm (32µin) finish, a thick Hardcoat can degrade it to Ra 1.2µm or higher due to the irregular growth of the oxide crystals.
Tip: If a super-smooth finish is required on a hardcoat part, you may need post-anodize honing or polishing (though this removes some coating thickness).
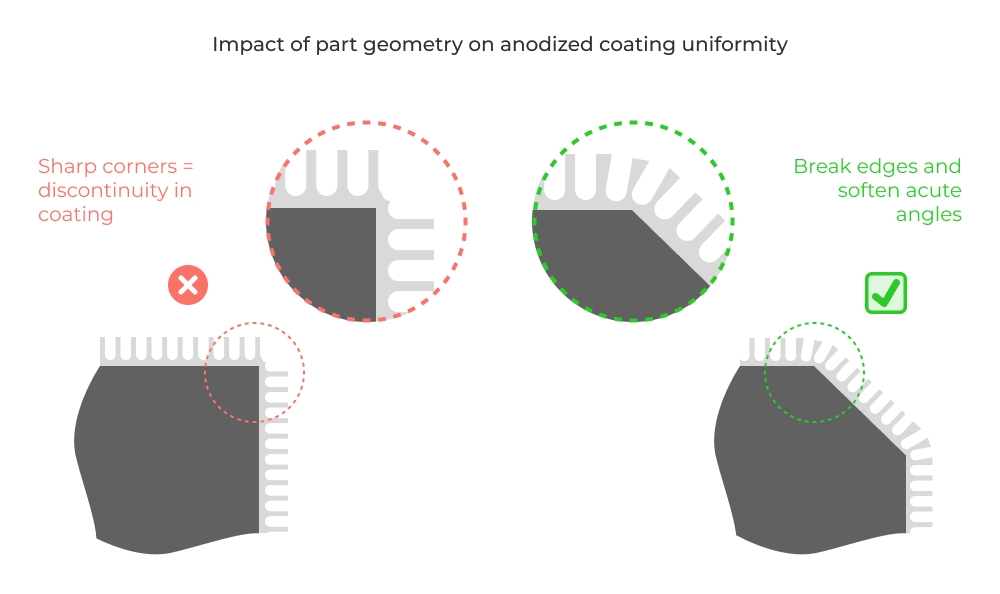
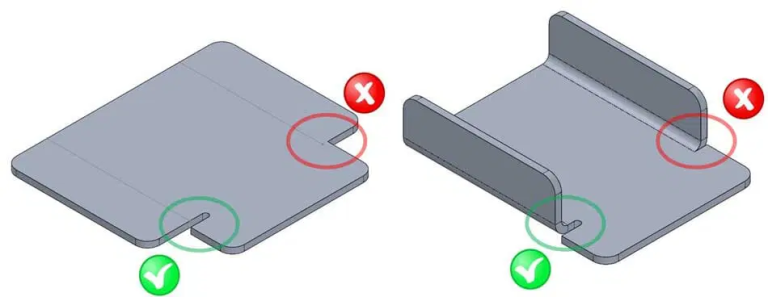
3. Sharp Edges and “Corner Void”
Anodic coatings grow perpendicular to the surface. At a sharp 90-degree outer corner, the coating grows outward in two diverging directions, creating a void or gap at the very tip of the corner. This creates a weak point where the coating can easily chip, exposing raw aluminum.
DFM Rule: Always apply a radius (minimum 0.5mm / 0.020”) to all external corners intended for Hardcoat anodizing. This ensures a continuous, strong oxide layer.
Diagram illustrating how anodic coating separates at sharp corners and how a radius ensures continuous coverage.
4. Racking Marks (The Unavoidable Witness)
To anodize a part, it must be electrically connected to the power source. This requires physically clamping the part onto a titanium or aluminum rack.
The Result: Where the rack touches the part, the anodizing solution cannot reach. This leaves small, raw aluminum spots called “Rack Marks” or “Contact Points.”
Your Job: On your technical drawing, specify where racking is acceptable (e.g., “Rack inside bore” or “Rack on rear face”). Do not leave this to chance, or the anodizer might rack on your critical cosmetic surface.
Material Selection: Not All Aluminum is Equal
The chemical composition of the aluminum alloy drastically affects the quality of the anodizing.
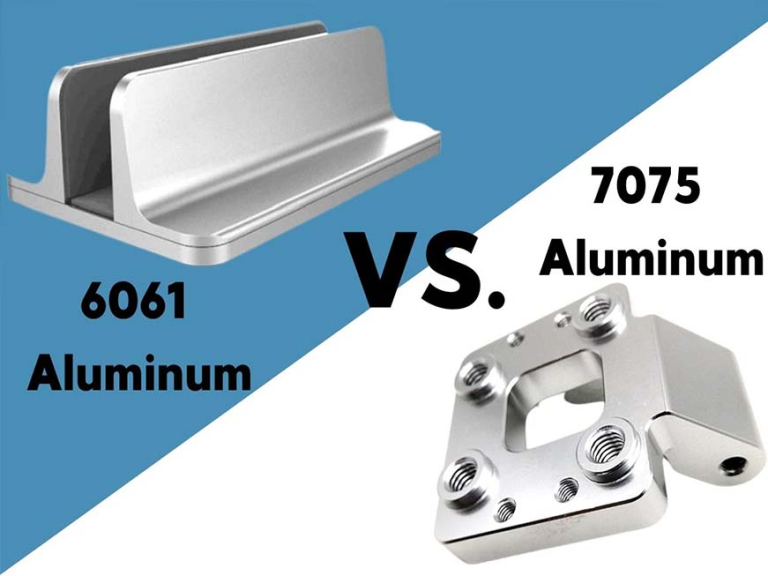
6000 Series (e.g., 6061, 6082)
Verdict:Excellent.
The magnesium and silicon alloying elements do not interfere with the process. 6061 is the gold standard for both Type II and Type III, producing clear, consistent, and hard coatings.
7000 Series (e.g., 7075)
Verdict:Good, but tricky.
Due to the high Zinc content, 7075 anodizes well but often takes on a yellowish or golden tint in Type III Hardcoat (even when undyed). It is difficult to get a consistent “clear” look.
2000 Series (e.g., 2024)
Verdict:Poor / Difficult.
These alloys contain high levels of Copper. Copper is highly conductive and dissolves preferentially in the acid bath. This leads to loose, powdery coatings and a high risk of “burning” (melting) the part during Type III anodizing.
Advice: Avoid 2024 for Type III Hardcoat if possible. If necessary, accept that the coating will be thinner and less wear-resistant.
Die Castings (e.g., A380)
Verdict:Terrible.
Die cast aluminum is porous and high in silicon. Anodizing die castings usually results in a blotchy, ugly, black/grey finish that provides poor protection. Powder coating is a better choice for castings.
Troubleshooting Common Defects
Knowing what can go wrong helps you perform better incoming inspections.
Crazing (Micro-cracking):
Appearance: Fine spiderweb cracks on the surface.
Cause: The thermal expansion coefficient of Aluminum Oxide is 5x lower than Aluminum. If a Hardcoated part is heated above 160°C (320°F), the aluminum expands faster than the coating, causing the coating to crack. This is normal for high-temp applications but reduces corrosion resistance.
Burning:
Appearance: Patches of rough, dissolved metal, often black or powdery.
Cause: Poor electrical contact or current density too high (common in 2000 series). The part essentially melts in the acid.
Color Variation:
Appearance: Parts in the same batch have different shades.
Cause: Variations in the alloy temper, time in the dye tank, or even the orientation of the part in the tank. Anodizing is an organic process; exact Pantone matching is extremely difficult compared to paint.
Conclusion: Making the Right Choice for Your Project
The decision between Type II and Type III Anodizing is a tradeoff between Aesthetics/Cost and Performance.
Specify Type II (Decorative) if: You need specific colors, the part is a cosmetic enclosure, or the tolerances are loose. It is the cost-effective standard for general industry.
Specify Type III (Hardcoat) if: The part is a gear, piston, sliding rail, or exposed to harsh chemicals. The extra cost is an investment in the part’s mechanical longevity.
At JFManufacturer, we offer comprehensive surface finishing services. Our DFM engineers review every file for “anodizing growth” issues, ensuring that your precision bearing bores still fit perfectly after coating.
Don’t let the finish be an afterthought. Upload your CAD models today for expert DFM feedback.
Frequently Asked Questions about Anodizing
Q1: Can I paint or powder coat over anodizing?
Yes. Anodizing (especially unsealed) is actually an excellent primer for paint because the porous surface allows for mechanical adhesion. This is often done to get the corrosion resistance of anodizing with the specific color of paint.
Q2: Is anodizing environmentally friendly?
Compared to other plating processes (like Chrome or Cadmium), anodizing is relatively safe. It is water-based, and the byproducts (aluminum hydroxide) are non-toxic. However, the acids used must be neutralized before disposal.
Q3: Can I re-anodize a part if the color is wrong?
Yes, but with a warning. We can “strip” the anodizing using a caustic solution, but this removes a layer of the base aluminum material (equal to the penetration depth). This will change the dimensions of your part, potentially making threads loose or holes oversized.
Q4: How do I specify anodizing on a print?
Be specific. Do not just say “Anodize.” Use the standard format: “Finish: Anodize per MIL-A-8625, Type III, Class 2 (Black dyed), 0.002″ thickness. Mask threads.”
Master sheet metal design with our 6 fundamental tips. Learn about uniform wall thickness, bend radii, and hole positioning for cost-effective fabrication....
Explore the ultimate guide to CNC surface finishes. From As-Machined and Bead Blasting to Anodizing and Powder Coating, learn how to choose the right finish for your parts....
Best for: Google search results (Keep it under 160 characters for best visibility) "Looking to reduce CNC machining costs? Read JFManufacturer's ultimate guide. Discover 10 money-saving tips from design to...
Ready to get started? Upload your CAD files and project details here. Our engineering team will review your request and provide a detailed quote, typically within 24 hours.